A total solar eclipse creates stunning celestial views for people within the path of the Moon’s shadow. This astronomical event is a unique opportunity for scientists to study the Sun and its influence on Earth, but it’s also a perfect opportunity to capture unforgettable images. Whether you’re an amateur photographer or a selfie master, try out these tips for photographing the eclipse.
NASA/Beth Anthony
#1 – Safety First
Looking directly at the Sun is dangerous to your eyes and your camera. To take images when the Sun is partially eclipsed, you’ll need to use a special solar filter to protect your camera, just as you’ll need a pair of solar viewing glasses (also called eclipse glasses) to protect your eyes. However, at totality, when the Moon completely blocks the Sun, make sure to remove the filter so you can see the Sun’s outer atmosphere – the corona.
#2 – Any Camera Is a Good Camera
Taking a stunning photo has more to do with the photographer than the camera. Whether you have a high-end DLSR or a camera phone, you can take great photos during the eclipse; after all, the best piece of equipment you can have is a good eye and a vision for the image you want to create. If you don’t have a telephoto zoom lens, focus on taking landscape shots and capture the changing environment.
Having a few other pieces of equipment can also come in handy during the eclipse. Using a tripod can help you stabilize the camera and avoid taking blurry images when there is low lighting. Additionally, using a delayed shutter release timer will allow you to snap shots without jiggling the camera.
#3 – Look Up, Down, All Around
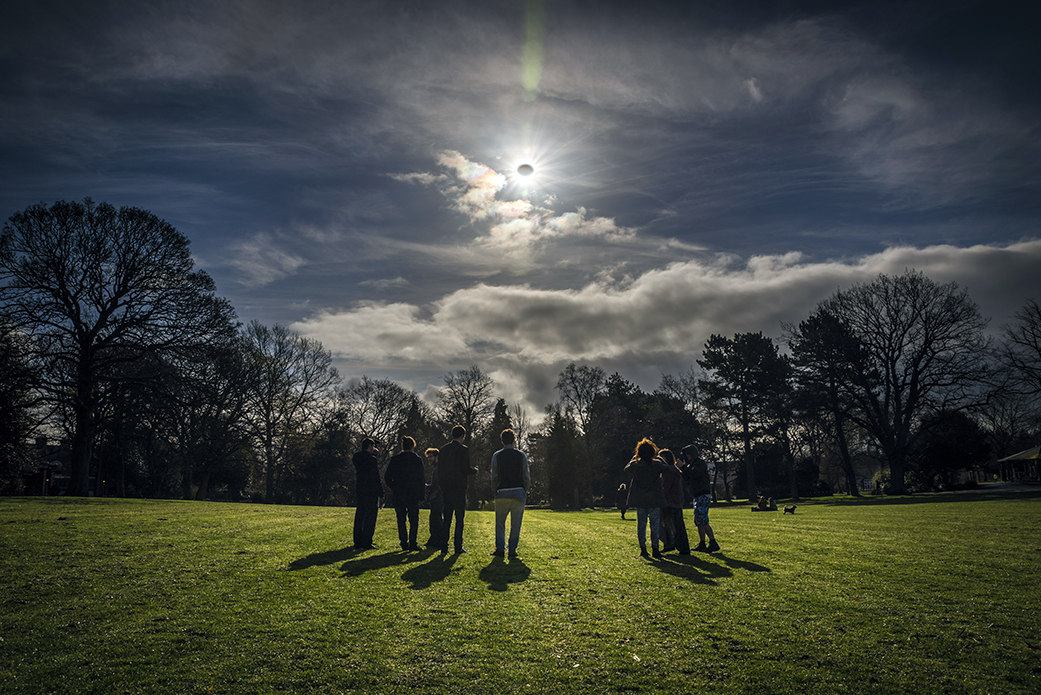
While the Sun is the most commanding element of a solar eclipse, remember to look around you. As the Moon slips in front of the Sun, the landscape will be bathed in eerie lighting and shadows. As light filters through the overlapping leaves of trees, it creates natural pinholes that project miniature eclipse replicas on the ground. Anywhere you can point your camera can yield exceptional imagery, so be sure to compose some wide-angle photos that can capture your eclipse experience.
NASA photographer Bill Ingalls recommends focusing on the human experience of watching the eclipse. “The real pictures are going to be of the people around you pointing, gawking, and watching it,” Ingalls noted. “Those are going to be some great moments to capture to show the emotion of the whole thing.”
#4 – Practice
Be sure you know the capabilities of your camera before eclipse day. Most cameras, and even some camera phones, have adjustable exposures, which can help you darken or lighten your image during the tricky eclipse lighting. Make sure you know how to manually focus the camera for crisp shots.
For DSLR cameras, the best way to determine the correct exposure is to test settings on the uneclipsed Sun beforehand. Using a fixed aperture of f/8 to f/16, try shutter speeds between 1/1000 to 1/4 second to find the optimal setting, which you can then use to take images during the partial stages of the eclipse. During totality, the corona has a wide range of brightness, so it’s best to use a fixed aperture and a range of exposures from approximately 1/1000 to 1 second.
#5 – Share!
Share your eclipse experience with friends and family afterwards. Tag @NASA to connect your photos on social media to those taken around the country and share them with NASA.
While you’re snapping those eclipse photos, don’t forget to stop and look at the eclipse with your own eyes. Just remember to wear your solar viewing glasses (also called eclipse glasses) for all stages of the eclipse before and after totality!
Related Links
- Learn more about the 2024 total solar eclipse
- Eclipse Photographers Will Help Study Sun During Its Disappearing Act
By Mara Johnson-Groh
NASA’s Goddard Space Flight Center, Greenbelt, Md.

