| 70-mm magazine N - AS13-58-8456 to 8481 |
Photography Index | 70-mm magazine L - AS13-60-8577 to 8725 |
No copyright is asserted for NASA photographs. If a recognizable person appears in a photo, use for commercial purposes may infringe a right of privacy or publicity. Photos may not be used to state or imply the endorsement by NASA or by any NASA employee of a commercial product, process or service, or used in any other manner that might mislead. Accordingly, it is requested that if a NASA photograph is used in advertising and other commercial promotion, layout and copy be submitted to NASA prior to release.
NASA photos reproduced from this archive should include photo credit to "NASA" or "National Aeronautics and Space Administration" and should include scanning credit to the appropriate individuals or agencies as noted in the captions.

|
AS13-59-8482 Browse or print resolution. Out of focus image of the interior of the Lunar Module. Both Jim Lovell and Fred Haise are in their normal stations in the spacecraft; Jim at the left station and Fred at the right station. Scanned image is rotated 90 degrees so the top of the cabin is to the left. Image credit: Image Science and Analysis Laboratory, NASA-Johnson Space Center. |

|
AS13-59-8483 Browse or print resolution. Interior of the Lunar Module. Fred Haise is at his normal stations in the spacecraft. Scanned image is rotated 90 degrees so the top of the cabin is to the left.Image credit: Image Science and Analysis Laboratory, NASA-Johnson Space Center. |

|
AS13-59-8484 Browse or print resolution. Jim Lovell at his station inside the Lunar Module Aquarius. Scanned image is rotated 90 degrees so the top of the cabin is to the left. Image credit: Image Science and Analysis Laboratory, NASA-Johnson Space Center. |

|
AS13-59-8485 Browse or print resolution. Interior of the Lunar Module. At the centre of the frame is the armrest that sits directly in front of the commander's attitude control, the Attitude Control Assembly. Beyond that, stored in a bag, is a 16-mm Maurer movie camera. Scanned image is rotated 90 degrees so the top of the cabin is to the left. Image credit: Image Science and Analysis Laboratory, NASA-Johnson Space Center. |

|
AS13-59-8486 Browse or print resolution. Interior of the Lunar Module. At the centre of the frame is the armrest that sits directly in front of the commander's attitude control, the Attitude Control Assembly. Beyond that, stored in a bag, is a 16-mm Maurer movie camera. Scanned image is rotated 90 degrees so the top of the cabin is to the left. Image credit: Image Science and Analysis Laboratory, NASA-Johnson Space Center. |

|
AS13-59-8487 Browse or print resolution. Interior of the Lunar Module. At the centre of the frame is the armrest that sits directly in front of the commander's attitude control, the Attitude Control Assembly. Beyond that, stored in a bag, is a 16-mm Maurer movie camera. Scanned image is rotated 90 degrees so the top of the cabin is to the left. Image credit: Image Science and Analysis Laboratory, NASA-Johnson Space Center. |

|
AS13-59-8488 Browse or print resolution. Interior of the Lunar Module looking towards the commander's station. Most prominent is Jim Lovell's watch. In front of him, stored in a bag, is a 16-mm Maurer movie camera. Scanned image is rotated 90 degrees so the top of the cabin is to the left. Image credit: Image Science and Analysis Laboratory, NASA-Johnson Space Center. |
|
|
AS13-59-8489 Browse or print resolution. Interior of the Lunar Module looking towards the commander's station. On the upper right of the frame is the control stick of the Attitude Control Assembly. The corner of the LM window is upper left. On the right, stored in a bag, is a 16-mm Maurer movie camera. Scanned image is rotated 90 degrees so the top of the cabin is to the left. Image credit: Image Science and Analysis Laboratory, NASA-Johnson Space Center. |

|
AS13-59-8490 Browse or print resolution. Interior of the Lunar Module looking towards the commander's station. On the centre-right of the frame is the armrest that sits directly in front of the commander's attitude control stick, visible at the top of the frame. Beyond that, stored in a bag, is a 16-mm Maurer movie camera. Note that the attached magazine is marked 'CEX' meaning it is loaded with colour film balanced for exterior conditions; i.e. for sunlight. Scanned image is rotated 90 degrees so the top of the cabin is to the left. Image credit: Image Science and Analysis Laboratory, NASA-Johnson Space Center. |

|
AS13-59-8491 Browse or print resolution. Lunar Module interior. Image includes an armrest Image credit: Image Science and Analysis Laboratory, NASA-Johnson Space Center. |
|
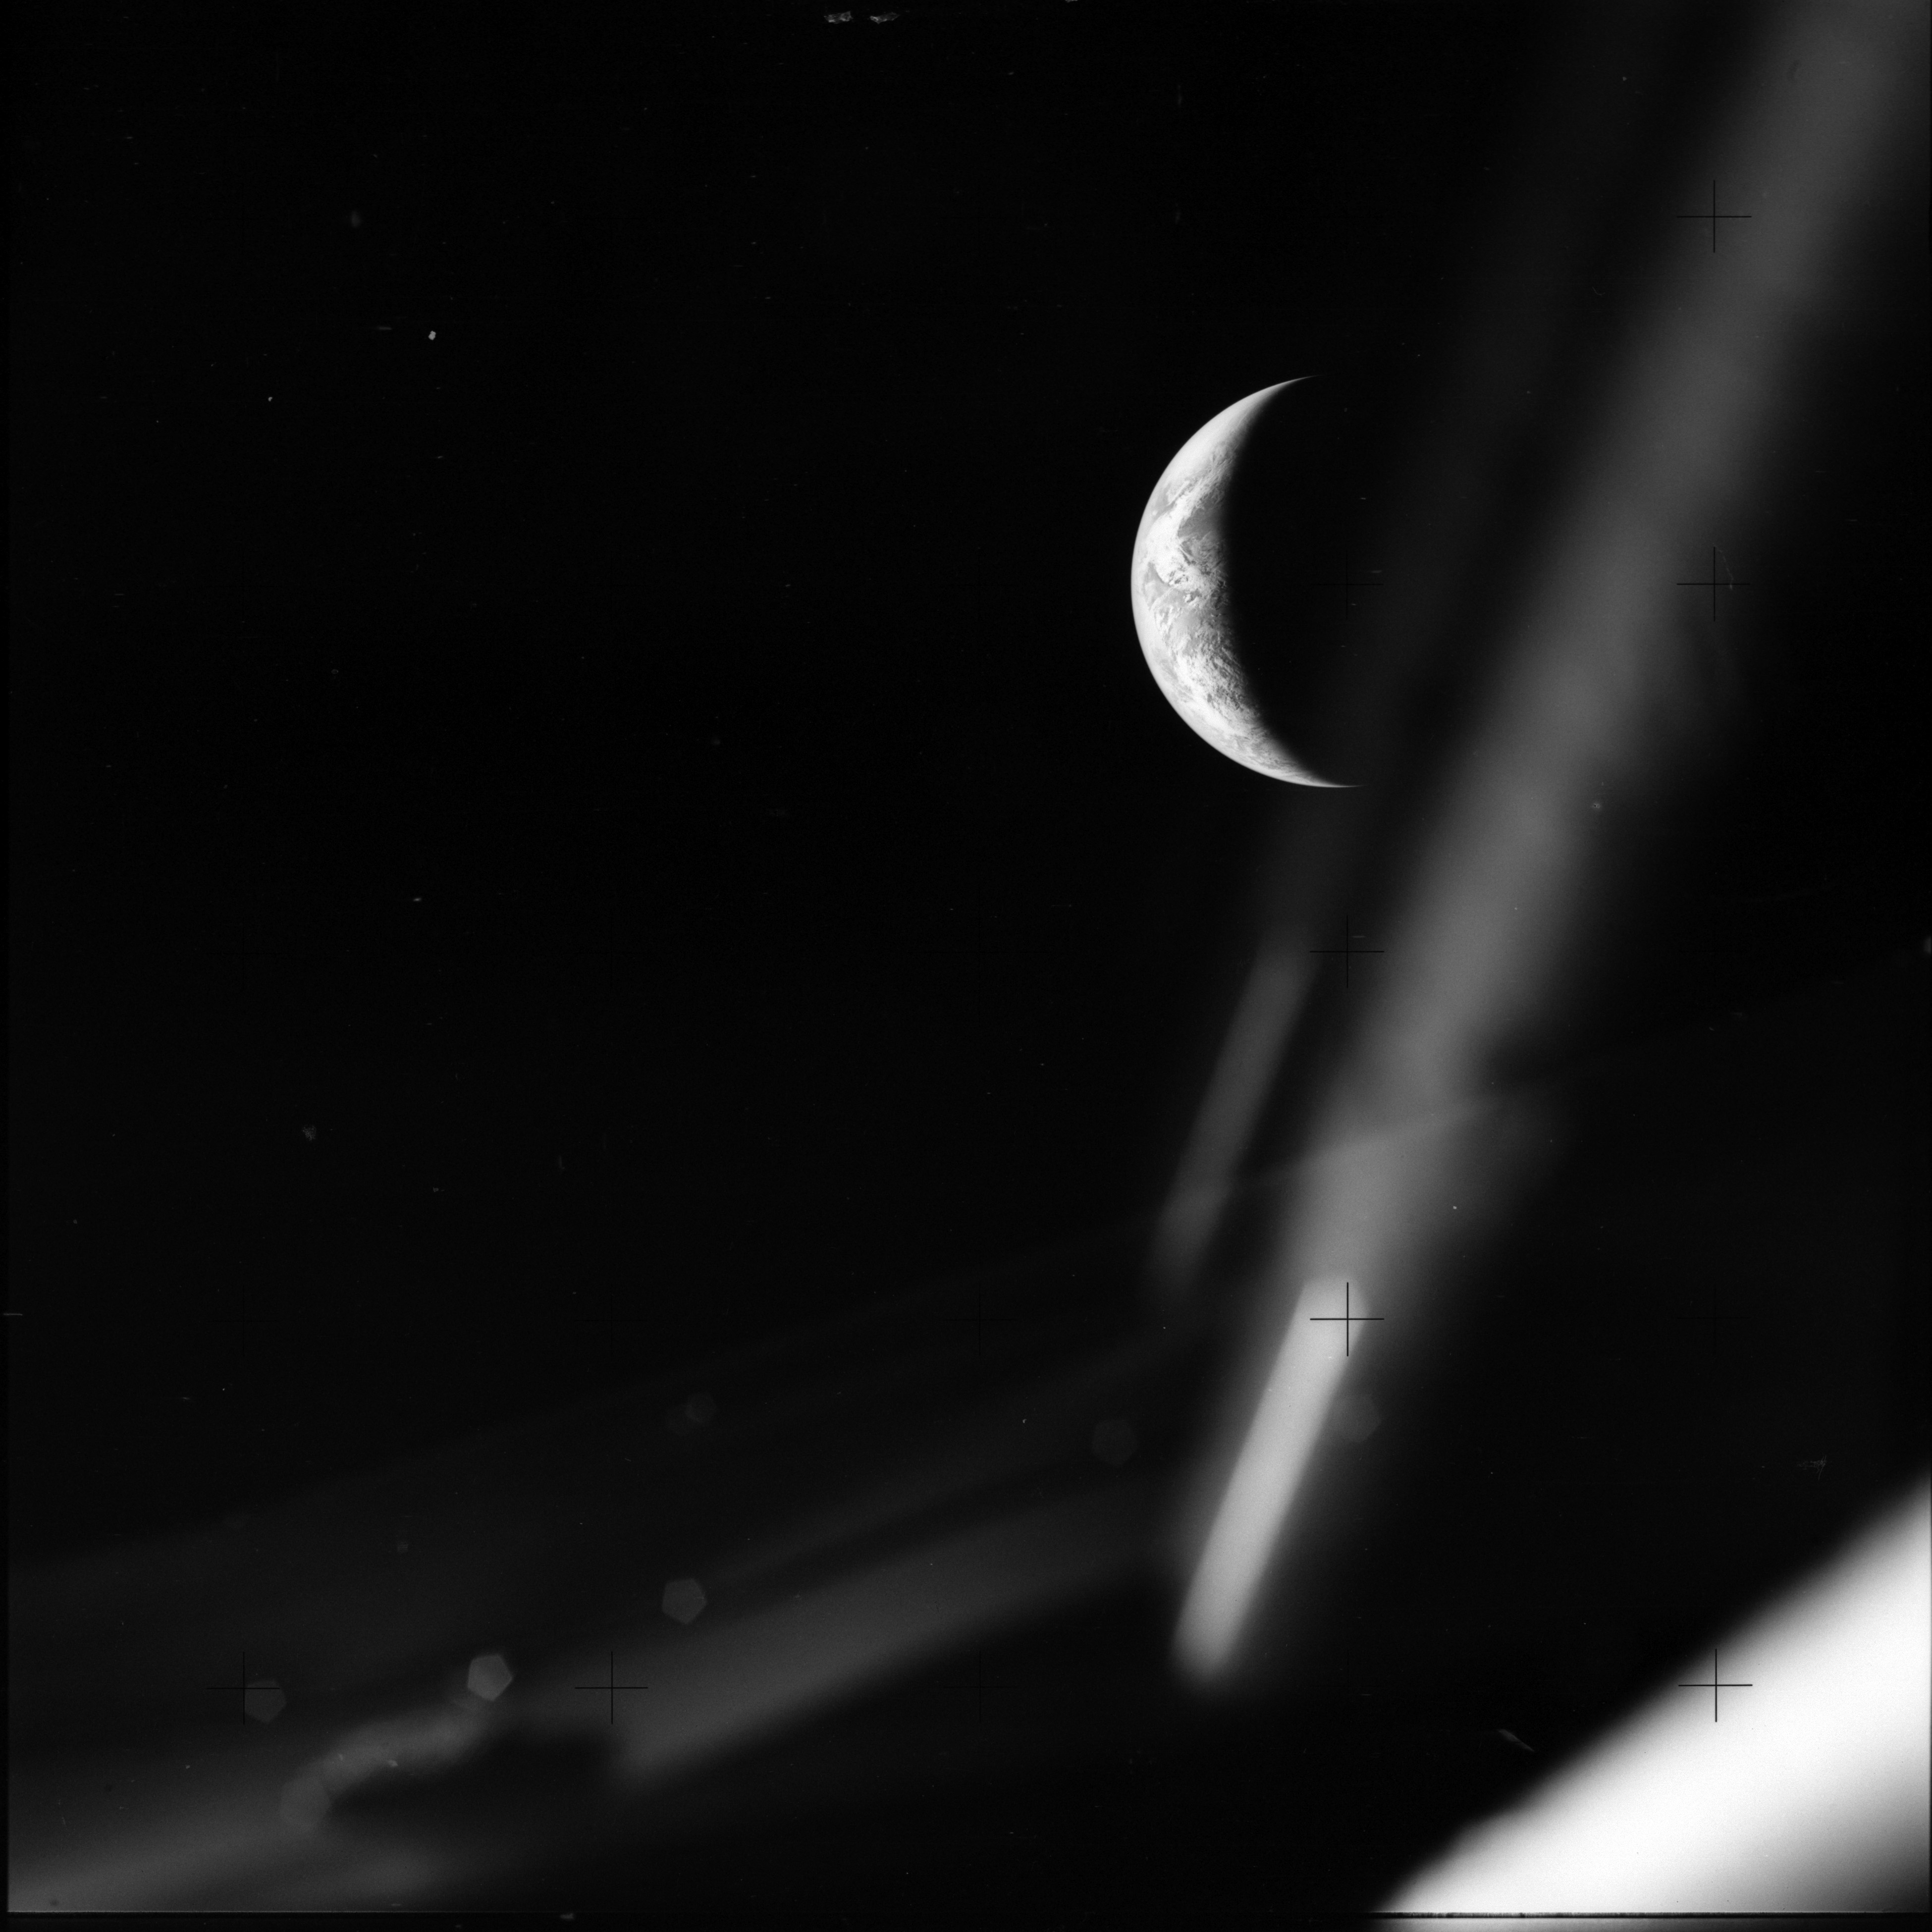
AS13-59-8492 Browse or print resolution. The crescent Earth during approach. Image credit: Image Science and Analysis Laboratory, NASA-Johnson Space Center. |

|
AS13-59-8493 Browse or print resolution. The crescent Earth during approach. Image credit: Image Science and Analysis Laboratory, NASA-Johnson Space Center. |

|
AS13-59-8494 Browse or print resolution. The crescent Earth during approach. Image credit: Image Science and Analysis Laboratory, NASA-Johnson Space Center. |

|
AS13-59-8495 Browse or print resolution. The crescent Earth during approach. Image credit: Image Science and Analysis Laboratory, NASA-Johnson Space Center. |

|
AS13-59-8496 Browse or print resolution. The crescent Earth during approach. Image credit: Image Science and Analysis Laboratory, NASA-Johnson Space Center. |

|
AS13-59-8497 Browse or print resolution. The crescent Earth during approach. Image credit: Image Science and Analysis Laboratory, NASA-Johnson Space Center. |

|
AS13-59-8498 Browse or print resolution. The crescent Earth during approach. Image credit: Image Science and Analysis Laboratory, NASA-Johnson Space Center. |

|
AS13-59-8499 Browse or print resolution. The crescent Earth during approach. Image credit: Image Science and Analysis Laboratory, NASA-Johnson Space Center. |

|
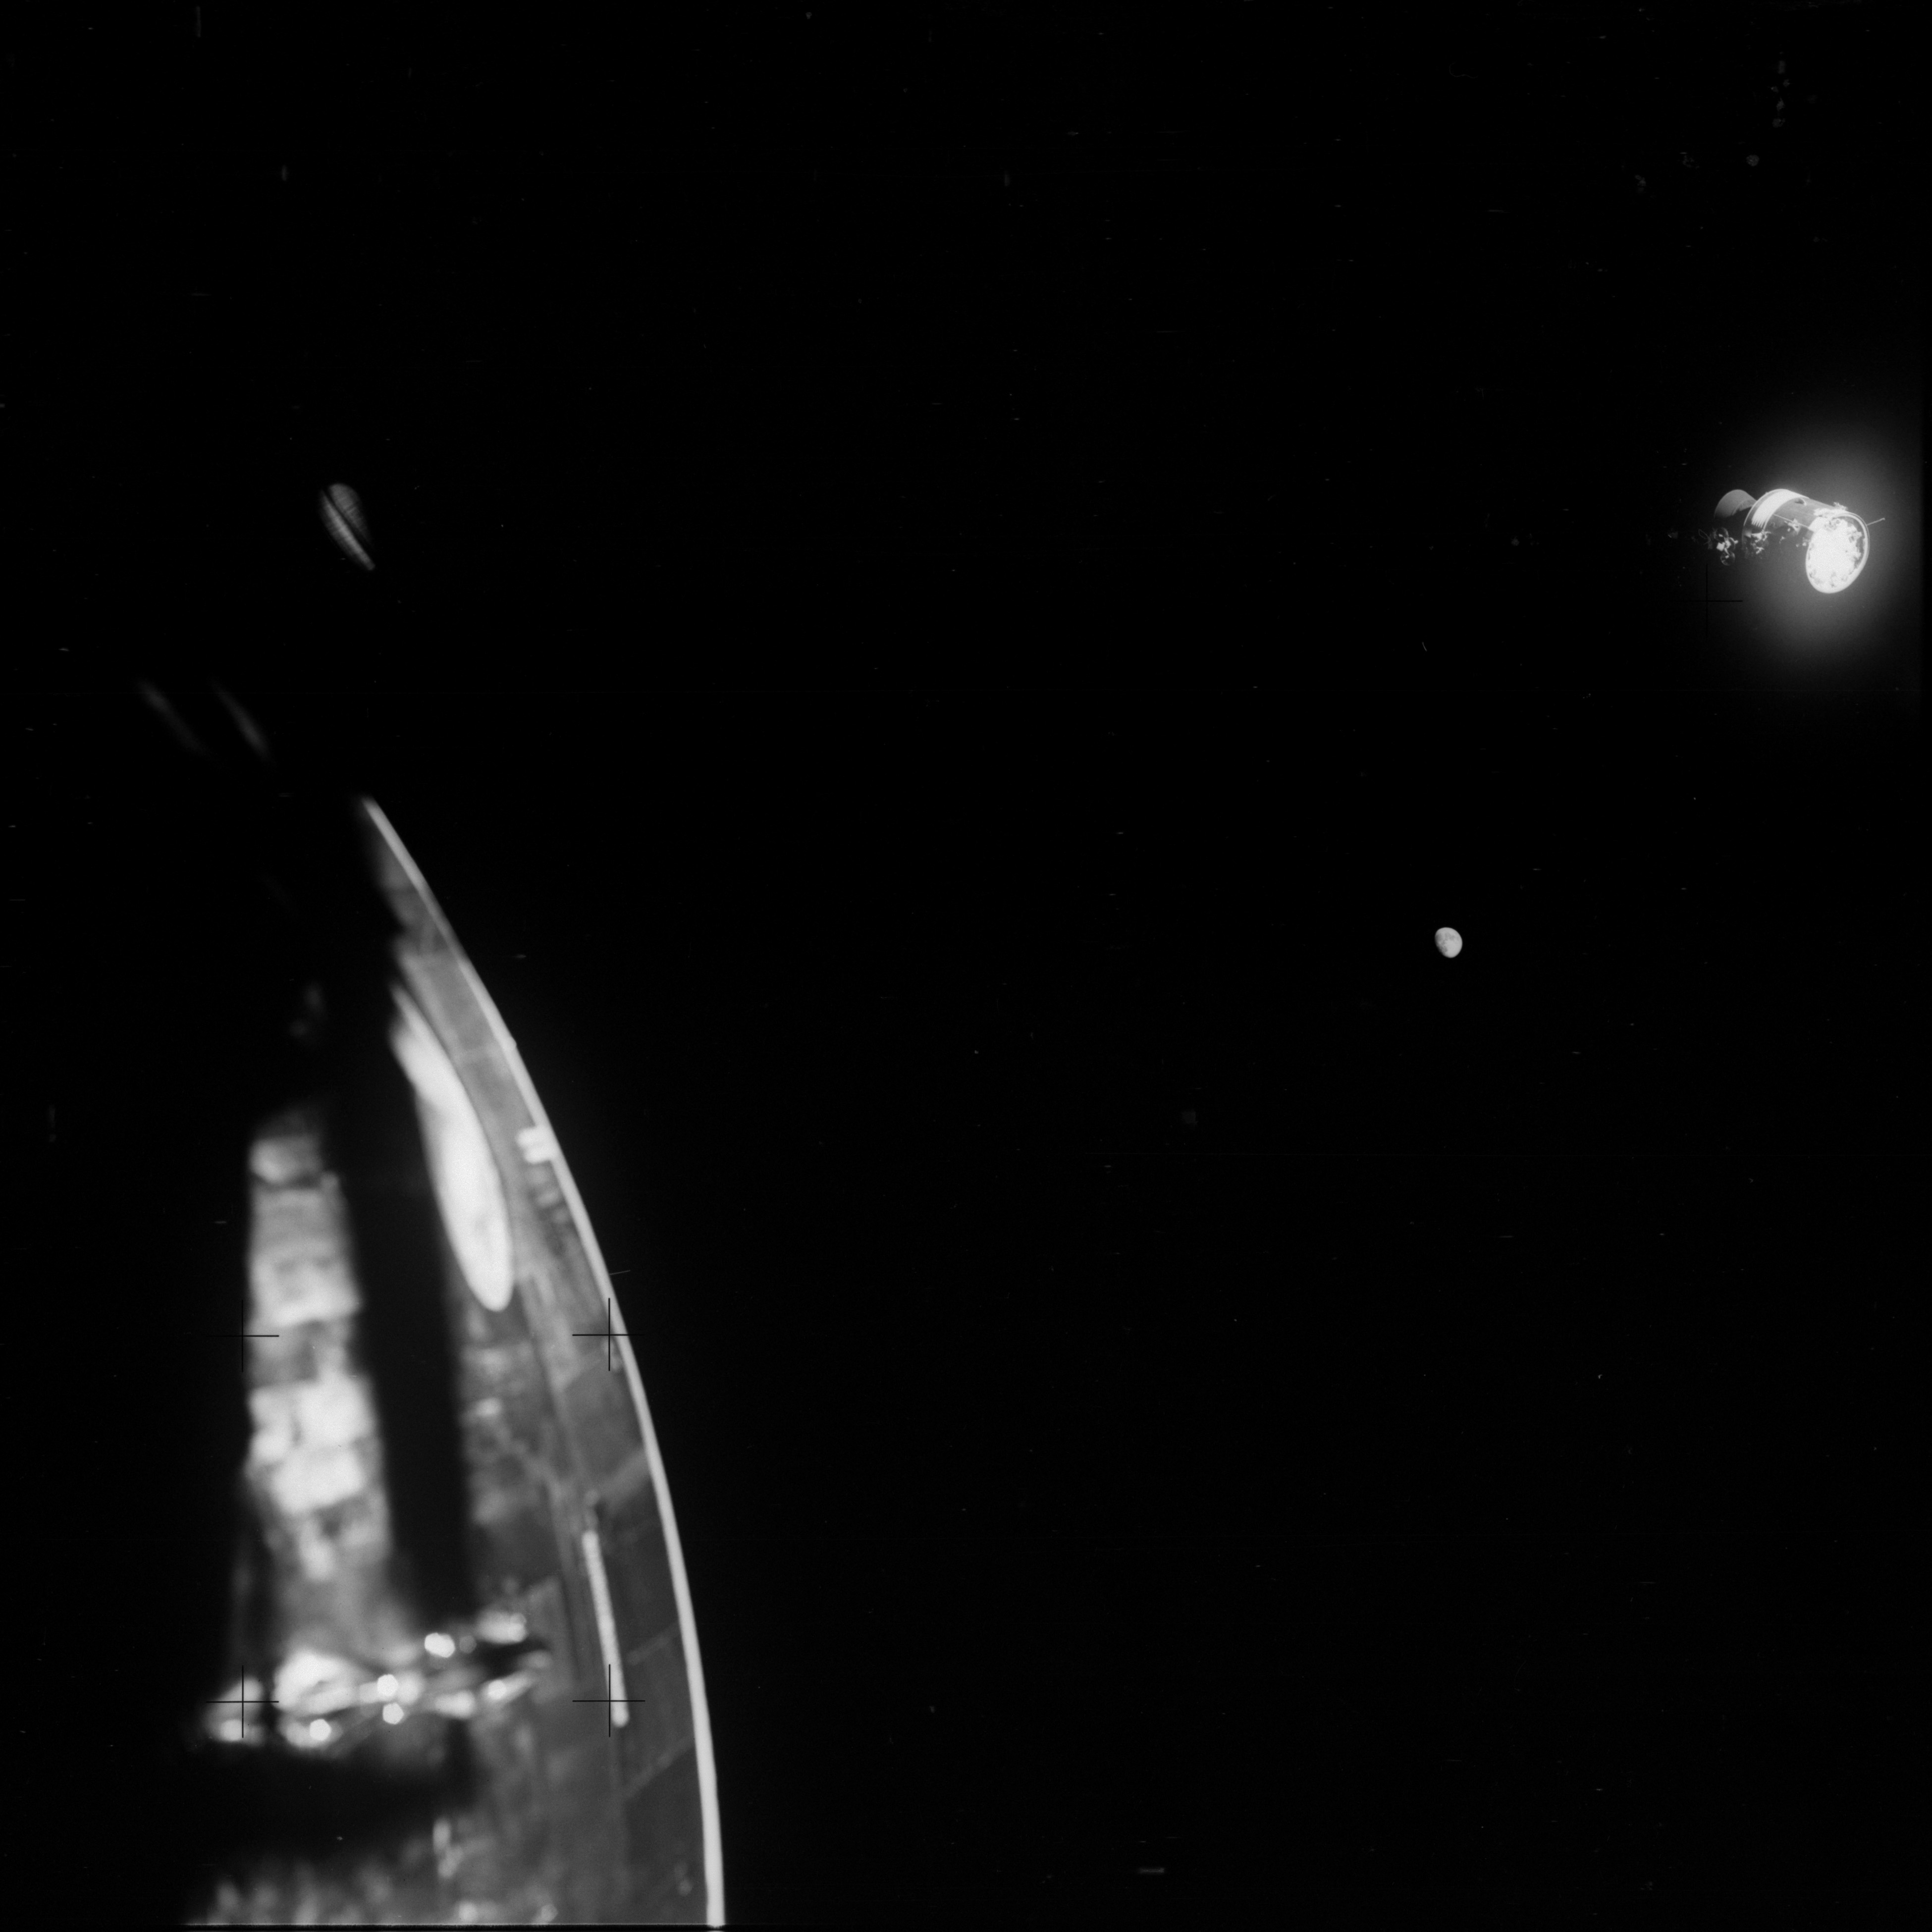
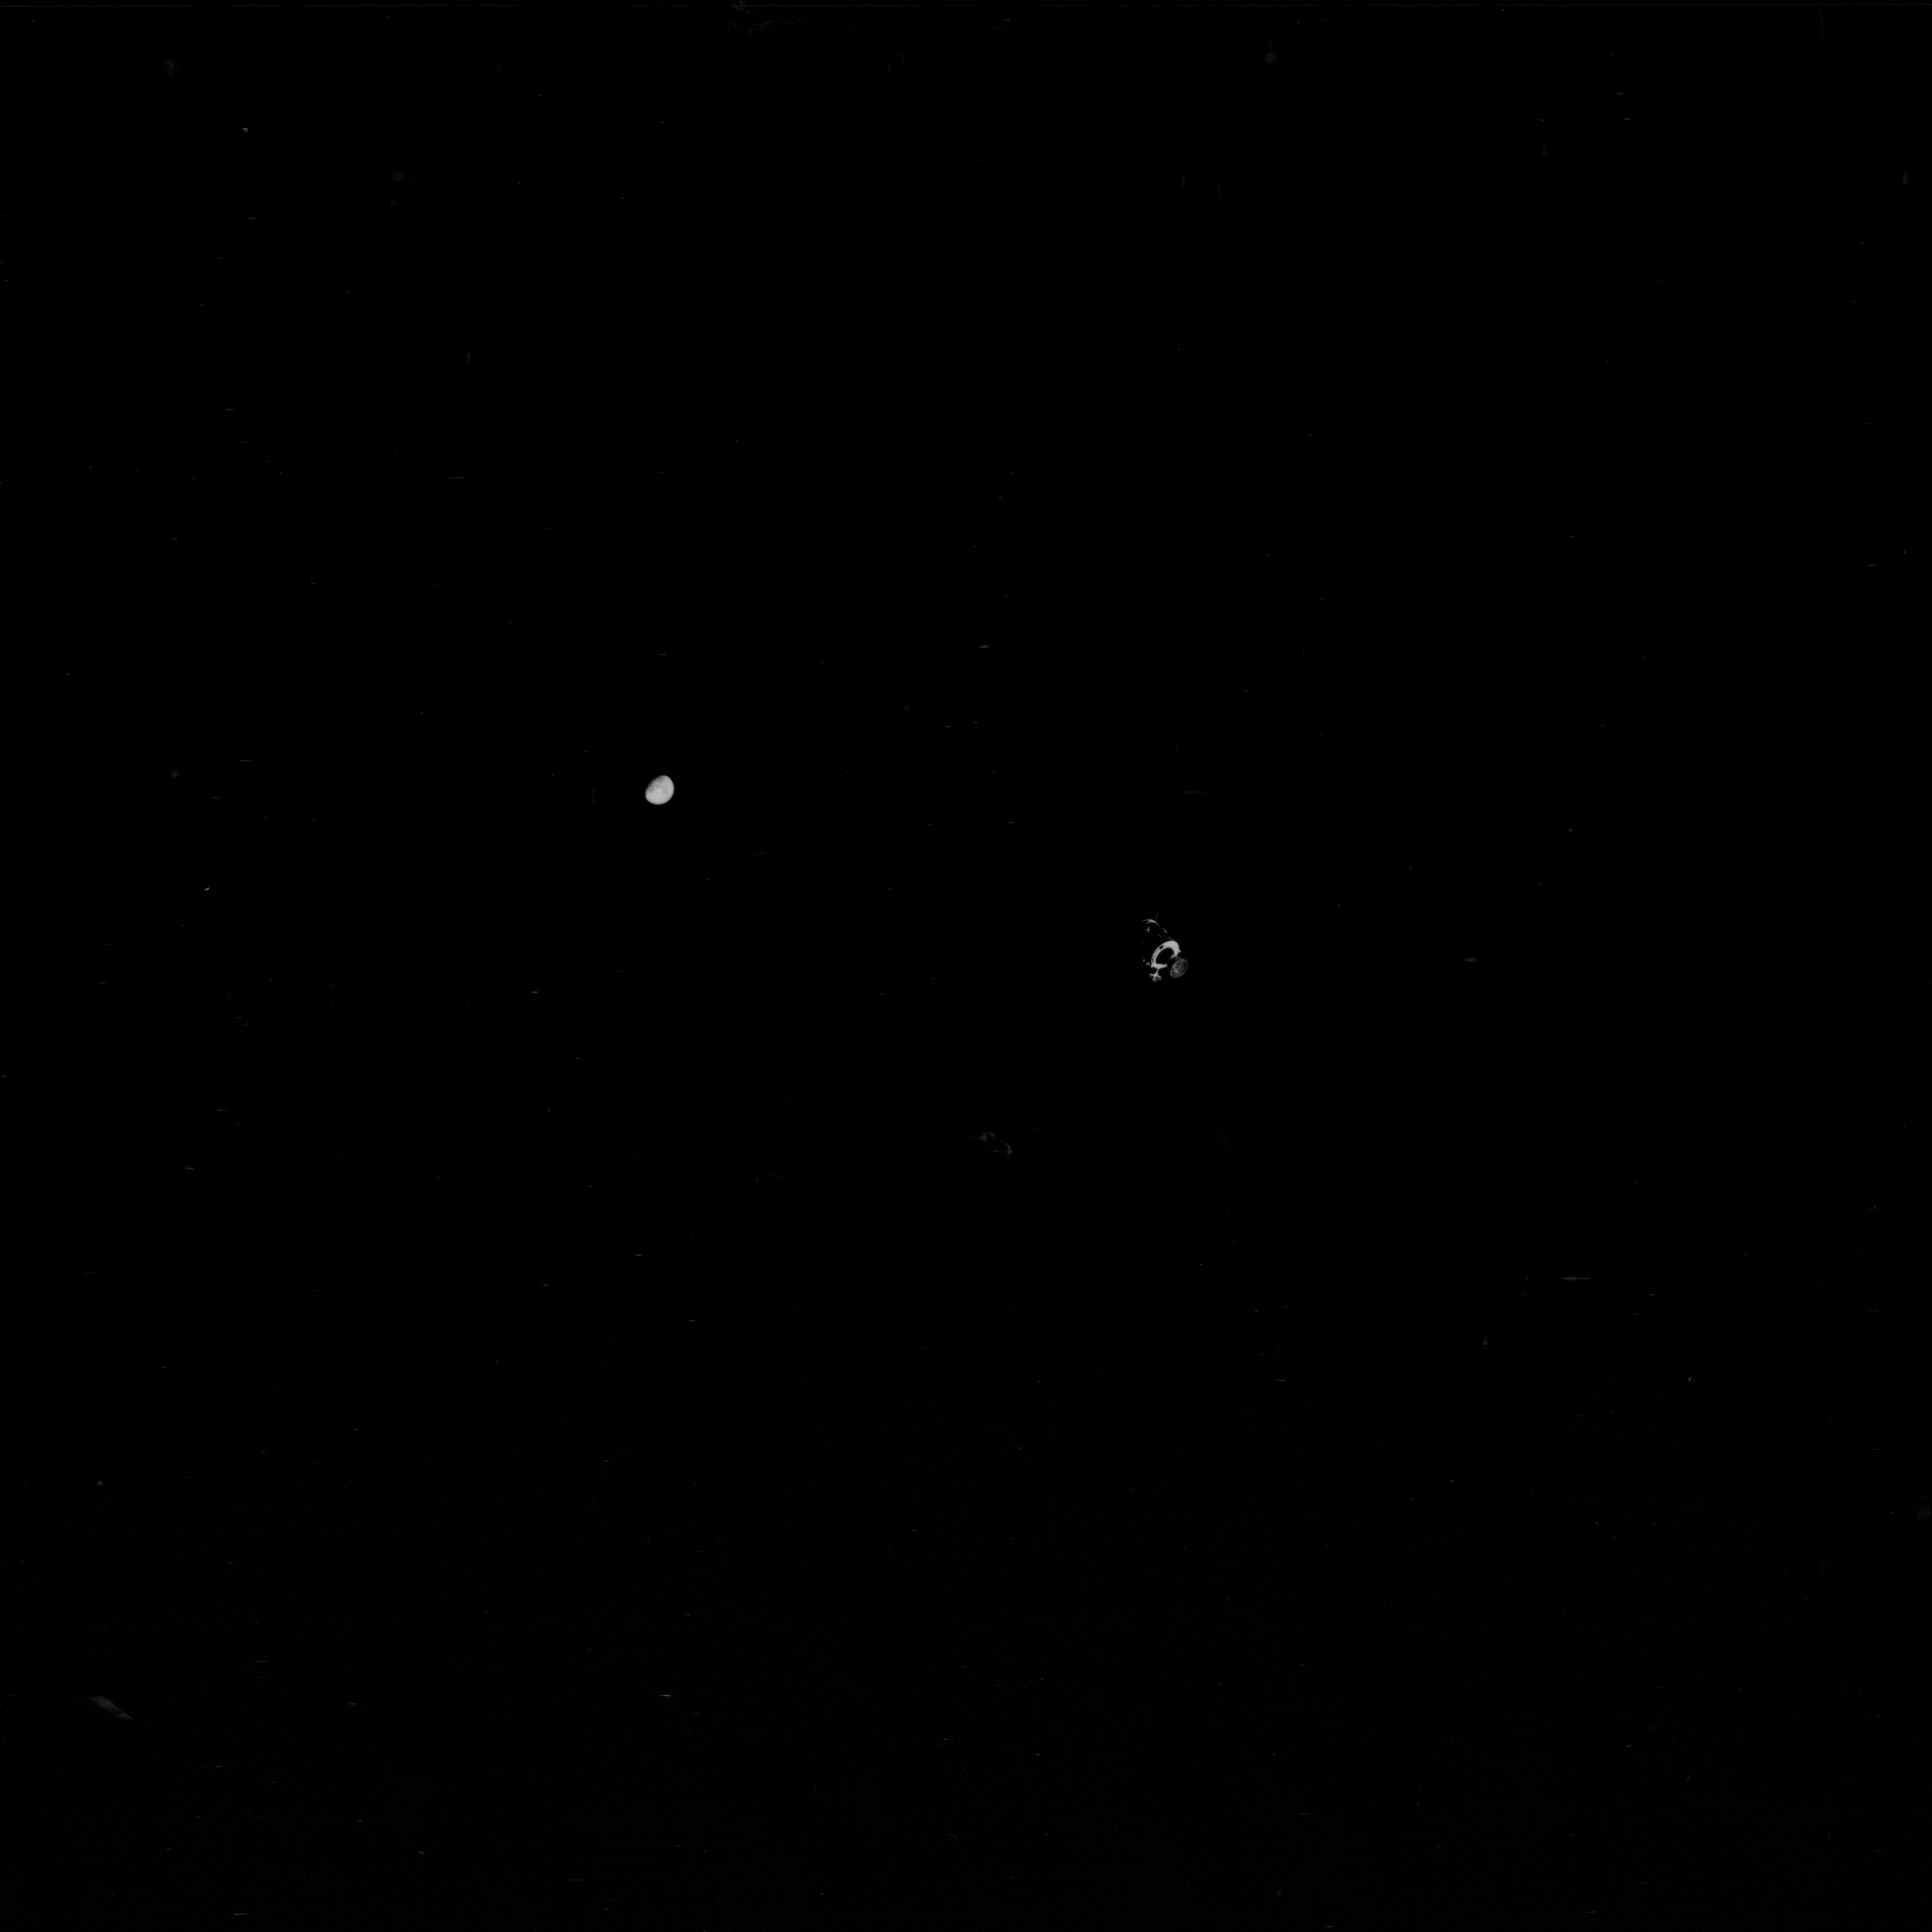
AS13-59-8500 Browse or print resolution. The damaged Service Module shortly after jettison. Image includes the Moon and the Command Module. Photographed from the Lunar Module. This is one of the clearest shots of the SM damage from the oxygen tank explosion. Image credit: Image Science and Analysis Laboratory, NASA-Johnson Space Center. |

|
AS13-59-8501 Browse or print resolution. The damaged Service Module shortly after jettison. Image includes the Moon and the Command Module. Photographed from the Lunar Module. This is one of the clearest shots of the SM damage from the oxygen tank explosion. Image credit: Image Science and Analysis Laboratory, NASA-Johnson Space Center. |

|
AS13-59-8502 Browse or print resolution. The Command Module photographed from the Lunar Module. Image credit: Image Science and Analysis Laboratory, NASA-Johnson Space Center. |

|
AS13-59-8503 Browse or print resolution. The Command Module photographed from the Lunar Module. Image credit: Image Science and Analysis Laboratory, NASA-Johnson Space Center. |

|
AS13-59-8504 Browse or print resolution. The Command Module photographed from the Lunar Module. Image credit: Image Science and Analysis Laboratory, NASA-Johnson Space Center. |

|
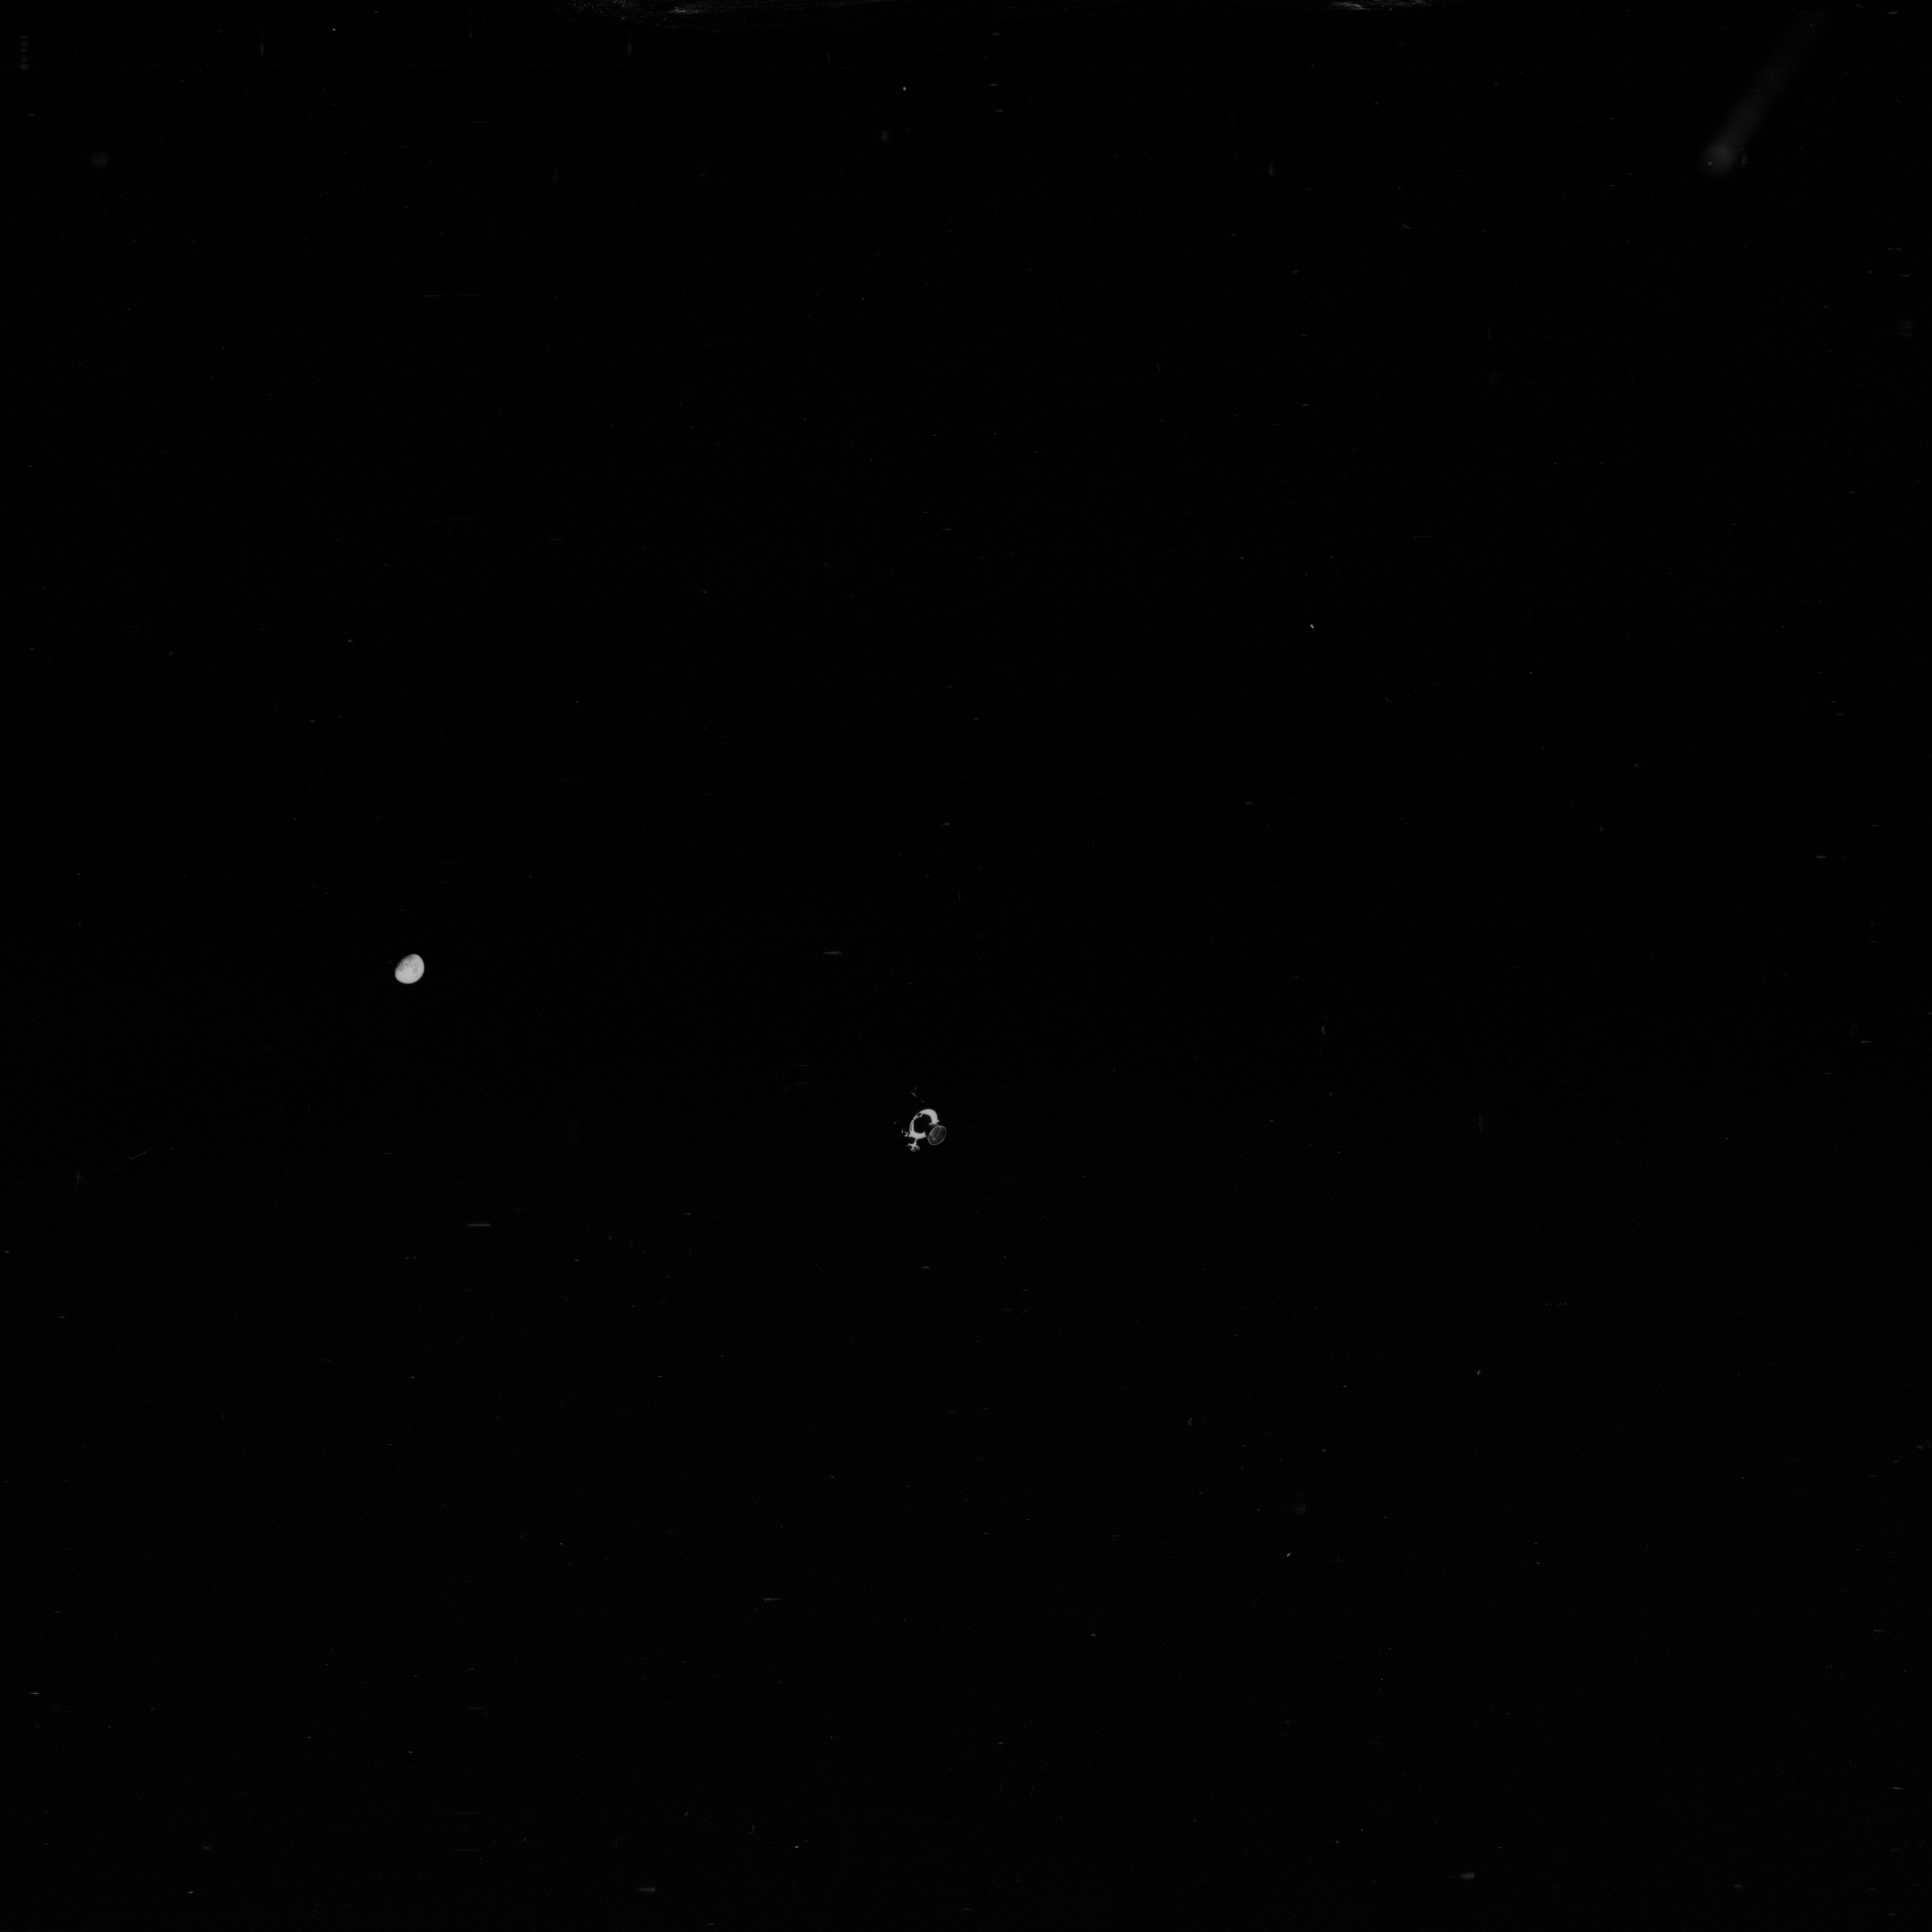
AS13-59-8505 Browse or print resolution. The Command Module and the Moon, photographed from the Lunar Module. Image credit: Image Science and Analysis Laboratory, NASA-Johnson Space Center. |

|
AS13-59-8506 Browse or print resolution. The Command Module and the Moon, photographed from the Lunar Module. Image credit: Image Science and Analysis Laboratory, NASA-Johnson Space Center. |

|
AS13-59-8507 Browse or print resolution. The Command Module and the Moon, photographed from the Lunar Module. Image credit: Image Science and Analysis Laboratory, NASA-Johnson Space Center. |

|
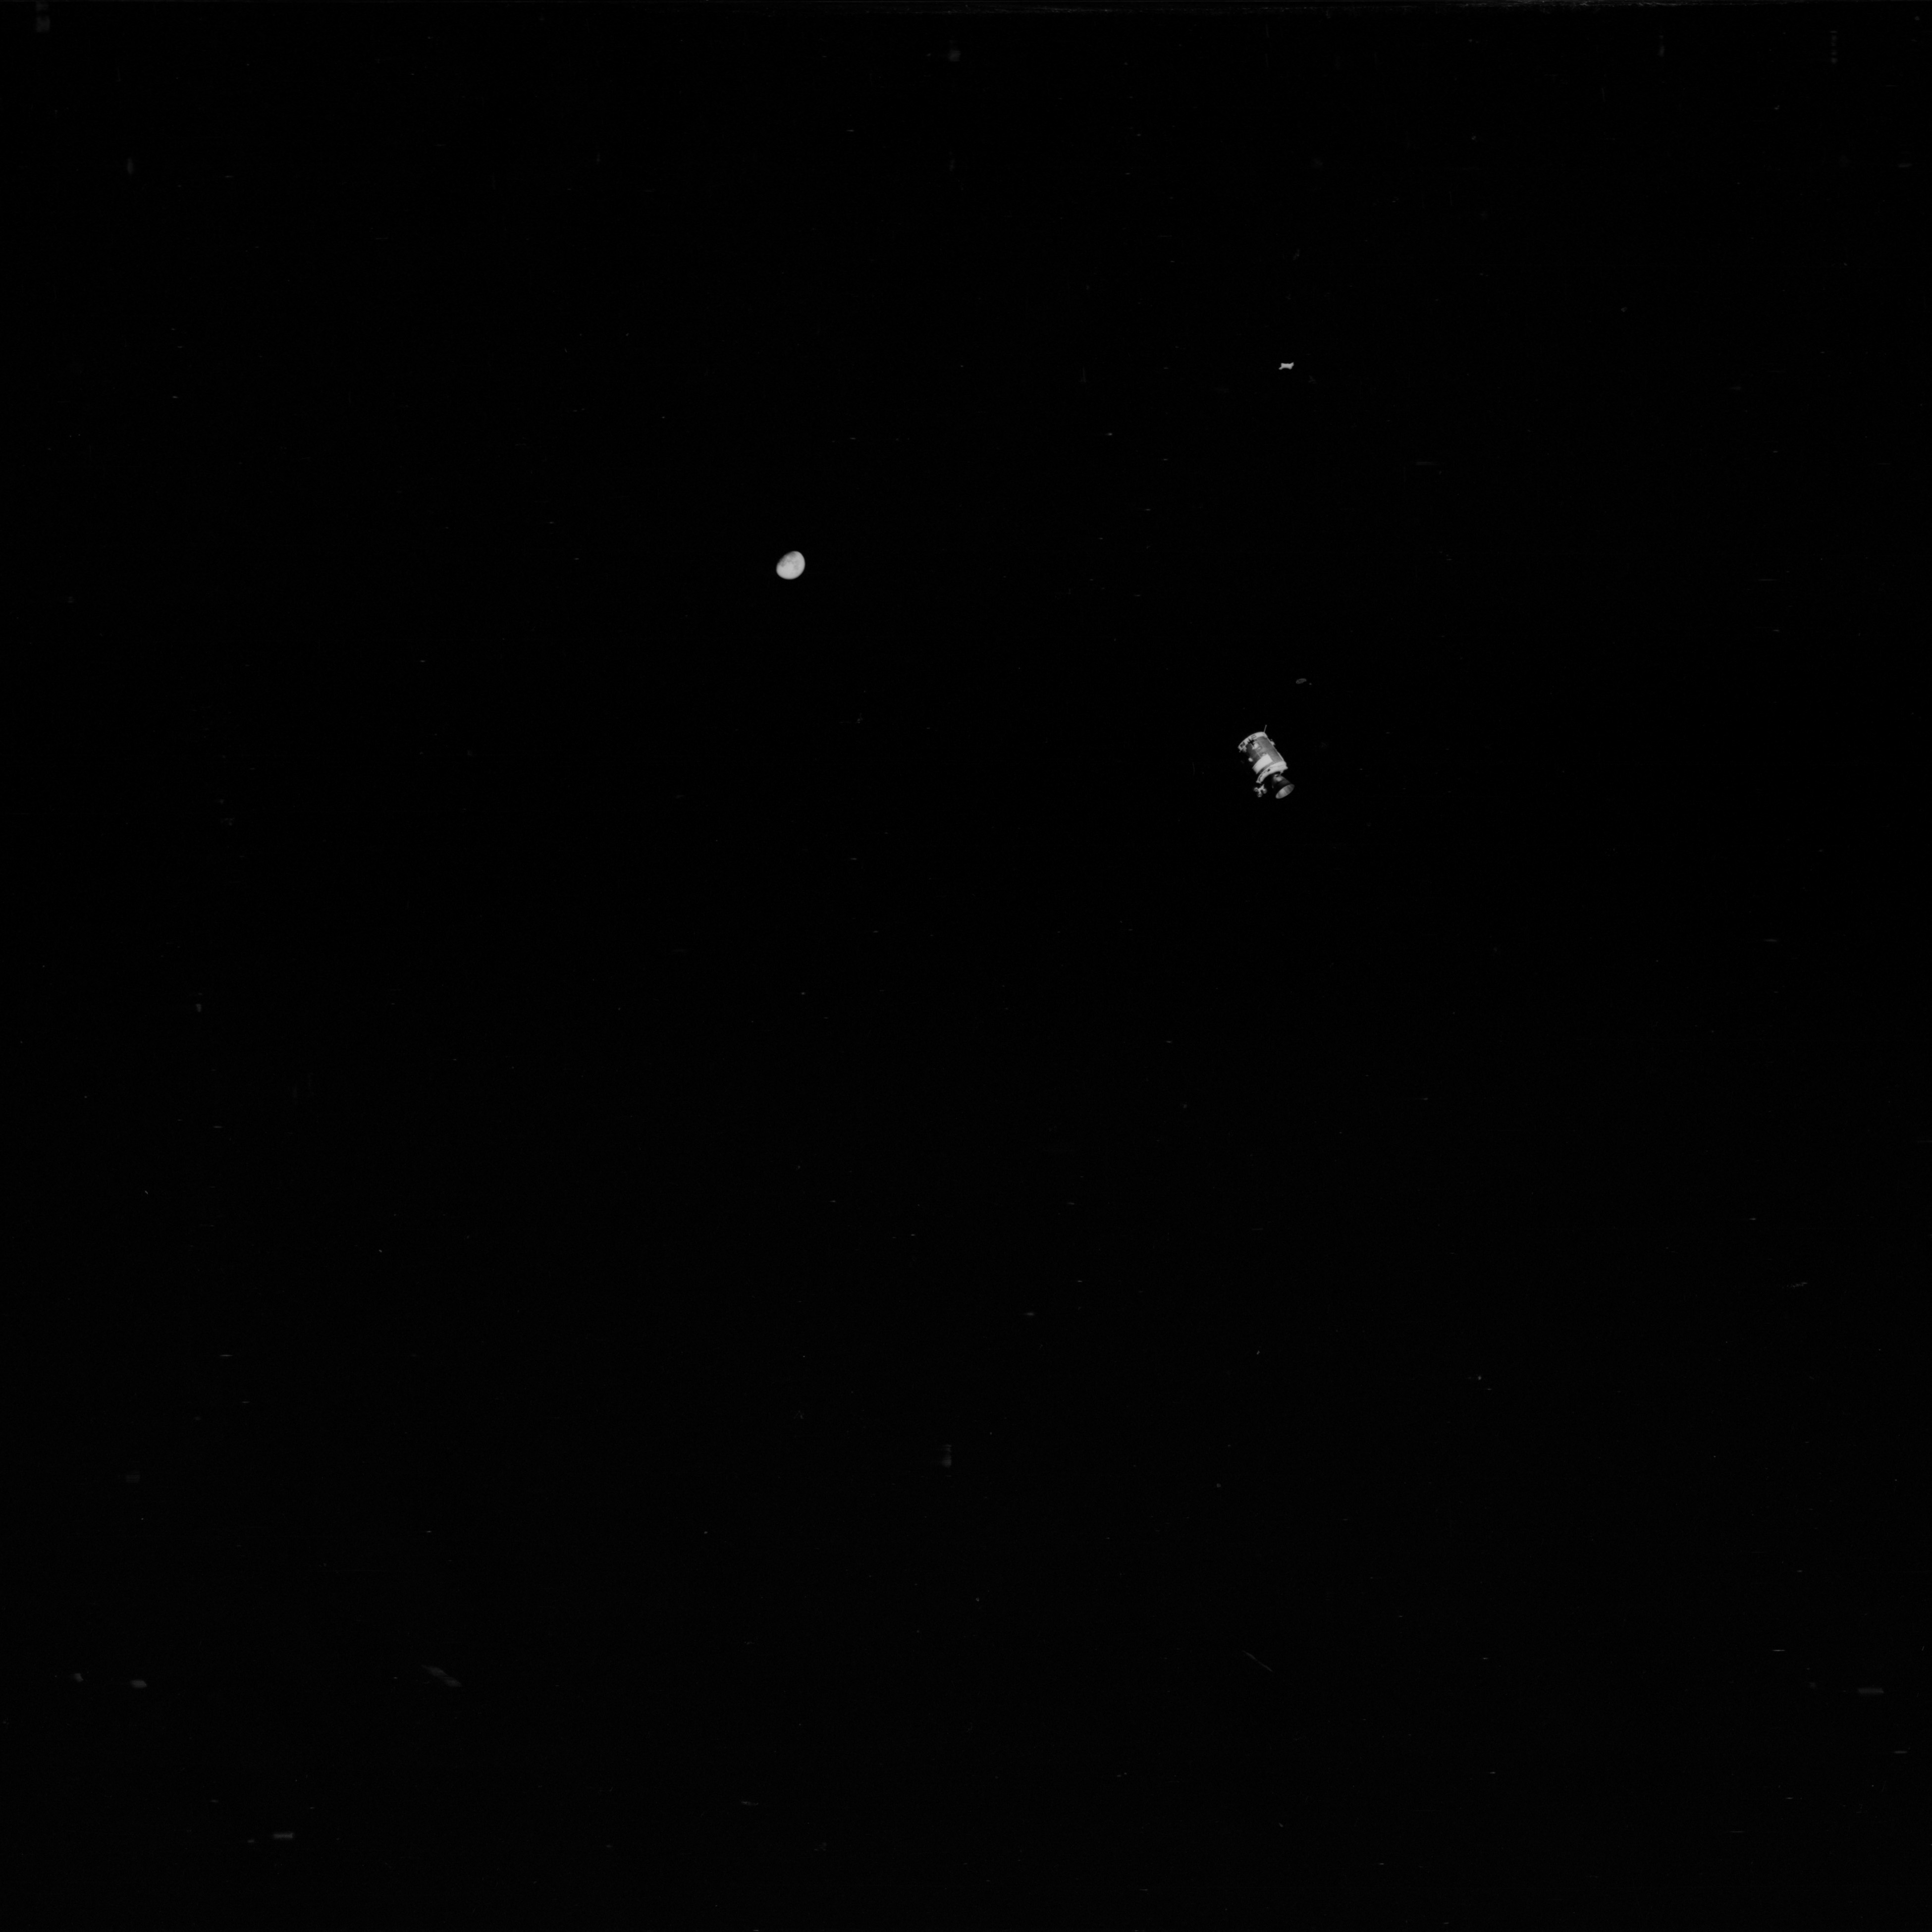
AS13-59-8508 Browse or print resolution. Distant Service Module is at the edge of frame. Image includes the Moon and the Command Module. Photographed from the Lunar Module. Image credit: Image Science and Analysis Laboratory, NASA-Johnson Space Center. |

|
AS13-59-8509 Browse or print resolution. Distant Service Module and Moon. Photographed from the Lunar Module with the Command Module in lower left. Image credit: Image Science and Analysis Laboratory, NASA-Johnson Space Center. |

|
AS13-59-8510 Browse or print resolution. Distant Service Module and Moon. Photographed from the Lunar Module with the Command Module in lower left. Image credit: Image Science and Analysis Laboratory, NASA-Johnson Space Center. |

|
AS13-59-8511 Browse or print resolution. Distant Service Module and Moon. Photographed from the Lunar Module with the Command Module in lower left. Image credit: Image Science and Analysis Laboratory, NASA-Johnson Space Center. |

|
AS13-59-8512 Browse or print resolution. Distant Service Module and Moon. Photographed from the Lunar Module with the Command Module in lower left. Image credit: Image Science and Analysis Laboratory, NASA-Johnson Space Center. |

|
AS13-59-8513 Browse or print resolution. Distant Service Module and Moon. Photographed from the Lunar Module with the Command Module in lower left. Image credit: Image Science and Analysis Laboratory, NASA-Johnson Space Center. |

|
AS13-59-8514 Browse or print resolution. Distant Service Module and Moon. Photographed from the Lunar Module with the Command Module in lower left. Image credit: Image Science and Analysis Laboratory, NASA-Johnson Space Center. |
|
AS13-59-8515 Browse or print resolution. Distant Service Module and Moon. Photographed from the Lunar Module with the Command Module in lower left. Image credit: Image Science and Analysis Laboratory, NASA-Johnson Space Center. |

|
AS13-59-8516 Browse or print resolution. Distant Service Module and Moon. Photographed from the Lunar Module with the Command Module in lower left. Image credit: Image Science and Analysis Laboratory, NASA-Johnson Space Center. |

|
AS13-59-8517 Browse or print resolution. Distant Service Module with Moon at very top edge of frame. Image credit: Image Science and Analysis Laboratory, NASA-Johnson Space Center. |

|
AS13-59-8518 Browse or print resolution. Distant Service Module with Moon at very top edge of frame. Image credit: Image Science and Analysis Laboratory, NASA-Johnson Space Center. |

|
AS13-59-8519 Browse or print resolution. Distant Service Module and Moon. Image credit: Image Science and Analysis Laboratory, NASA-Johnson Space Center. |

|
AS13-59-8520 Browse or print resolution. Distant Service Module and Moon. Image credit: Image Science and Analysis Laboratory, NASA-Johnson Space Center. |

|
AS13-59-8521 Browse or print resolution. Distant Service Module and Moon. Image credit: Image Science and Analysis Laboratory, NASA-Johnson Space Center. |

|
AS13-59-8522 Browse or print resolution. Distant Service Module and Moon. Image credit: Image Science and Analysis Laboratory, NASA-Johnson Space Center. |

|
AS13-59-8523 Browse or print resolution. Distant Service Module and Moon. Image credit: Image Science and Analysis Laboratory, NASA-Johnson Space Center. |

|
AS13-59-8524 Browse or print resolution. Distant Service Module and Moon. Image credit: Image Science and Analysis Laboratory, NASA-Johnson Space Center. |

|
AS13-59-8525 Browse or print resolution. Distant Service Module and Moon. Image credit: Image Science and Analysis Laboratory, NASA-Johnson Space Center. |
|
AS13-59-8526 Browse or print resolution. Distant Service Module and Moon. Image credit: Image Science and Analysis Laboratory, NASA-Johnson Space Center. |

|
AS13-59-8527 Browse or print resolution. Distant Service Module and Moon. Image credit: Image Science and Analysis Laboratory, NASA-Johnson Space Center. |
|
AS13-59-8528 Browse or print resolution. Distant Service Module and Moon. Image credit: Image Science and Analysis Laboratory, NASA-Johnson Space Center. |
|
AS13-59-8529 Browse or print resolution. Distant Service Module and Moon. Image credit: Image Science and Analysis Laboratory, NASA-Johnson Space Center. |

|
AS13-59-8530 Browse or print resolution. Distant Service Module and Moon. Image credit: Image Science and Analysis Laboratory, NASA-Johnson Space Center. |

|
AS13-59-8531 Browse or print resolution. Distant Service Module and Moon. Disrupted sector of spacecraft is visible. Image credit: Image Science and Analysis Laboratory, NASA-Johnson Space Center. |

|
AS13-59-8532 Browse or print resolution. Distant Service Module and Moon. Disrupted sector of spacecraft is visible. Image credit: Image Science and Analysis Laboratory, NASA-Johnson Space Center. |

|
AS13-59-8533 Browse or print resolution. Distant Service Module and Moon. Disrupted sector of spacecraft is visible. Image credit: Image Science and Analysis Laboratory, NASA-Johnson Space Center. |

|
AS13-59-8534 Browse or print resolution. Distant Service Module and Moon. Disrupted sector of spacecraft is visible. Image credit: Image Science and Analysis Laboratory, NASA-Johnson Space Center. |

|
AS13-59-8535 Browse or print resolution. Distant Service Module and Moon. Disrupted sector of spacecraft is visible. Image credit: Image Science and Analysis Laboratory, NASA-Johnson Space Center. |

|
AS13-59-8536 Browse or print resolution. Distant Service Module and Moon. Image credit: Image Science and Analysis Laboratory, NASA-Johnson Space Center. |

|
AS13-59-8537 Browse or print resolution. Distant Service Module and Moon. Image credit: Image Science and Analysis Laboratory, NASA-Johnson Space Center. |

|
AS13-59-8538 Browse or print resolution. Distant Service Module and Moon. Image credit: Image Science and Analysis Laboratory, NASA-Johnson Space Center. |

|
AS13-59-8539 Browse or print resolution. Distant Service Module and Moon. Image credit: Image Science and Analysis Laboratory, NASA-Johnson Space Center. |

|
AS13-59-8540 Browse or print resolution. Distant Service Module and Moon. Image credit: Image Science and Analysis Laboratory, NASA-Johnson Space Center. |

|
AS13-59-8541 Browse or print resolution. Distant Service Module and Moon. Image credit: Image Science and Analysis Laboratory, NASA-Johnson Space Center. |

|
AS13-59-8542 Browse or print resolution. Distant Service Module and Moon. Image credit: Image Science and Analysis Laboratory, NASA-Johnson Space Center. |

|
AS13-59-8543 Browse or print resolution. Distant Service Module and Moon. Image credit: Image Science and Analysis Laboratory, NASA-Johnson Space Center. |

|
AS13-59-8544 Browse or print resolution. Distant Service Module and Moon. Image credit: Image Science and Analysis Laboratory, NASA-Johnson Space Center. |

|
AS13-59-8545 Browse or print resolution. Distant Service Module and Moon. Image credit: Image Science and Analysis Laboratory, NASA-Johnson Space Center. |

|
AS13-59-8546 Browse or print resolution. Distant Service Module and Moon. Image credit: Image Science and Analysis Laboratory, NASA-Johnson Space Center. |

|
AS13-59-8547 Browse or print resolution. Distant Service Module and Moon. Image credit: Image Science and Analysis Laboratory, NASA-Johnson Space Center. |

|
AS13-59-8548 Browse or print resolution. Distant Service Module and Moon. Image credit: Image Science and Analysis Laboratory, NASA-Johnson Space Center. |

|
AS13-59-8549 Browse or print resolution. Lunar Module Aquarius seen from the Command Module shortly before LM jettison. A RCS thruster quad assembly is centre frame. Image credit: Image Science and Analysis Laboratory, NASA-Johnson Space Center. |

|
AS13-59-8550 Browse or print resolution. Lunar Module Aquarius seen from the Command Module shortly before LM jettison. A RCS thruster quad assembly is on the left and the LM's overhead docking window is on the right. Image credit: Image Science and Analysis Laboratory, NASA-Johnson Space Center. |

|
AS13-59-8551 Browse or print resolution. Lunar Module Aquarius seen from the Command Module shortly before LM jettison. One of the LM footpads is centre frame. Image credit: Image Science and Analysis Laboratory, NASA-Johnson Space Center. |

|
AS13-59-8552 Browse or print resolution. Lunar Module Aquarius seen from the Command Module shortly before LM jettison. A RCS thruster quad assembly is at the top and a LM footpad is just below the centre of the frame. Image credit: Image Science and Analysis Laboratory, NASA-Johnson Space Center. |

|
AS13-59-8553 Browse or print resolution. Lunar Module Aquarius seen from the Command Module shortly before LM jettison. A RCS thruster quad assembly is on the left and the LM's overhead docking window is on the right. Image credit: Image Science and Analysis Laboratory, NASA-Johnson Space Center. |

|
AS13-59-8554 Browse or print resolution. Lunar Module Aquarius seen from the Command Module shortly before LM jettison. A RCS thruster quad assembly is on the left and the LM's overhead docking window is on the right. Image credit: Image Science and Analysis Laboratory, NASA-Johnson Space Center. |

|
AS13-59-8555 Browse or print resolution. Lunar Module Aquarius seen from the Command Module shortly before LM jettison. A RCS thruster quad assembly is on the left and the LM's overhead docking window is on the right. Image credit: Image Science and Analysis Laboratory, NASA-Johnson Space Center. |

|
AS13-59-8556 Browse or print resolution. Lunar Module Aquarius seen from the Command Module shortly before LM jettison. A RCS thruster quad assembly is on the left and the LM's overhead docking window is on the right. Image credit: Image Science and Analysis Laboratory, NASA-Johnson Space Center. |

|
AS13-59-8557 Browse or print resolution. Lunar Module Aquarius seen from the Command Module shortly before LM jettison. A RCS thruster quad assembly is on the left and the LM's overhead docking window is on the right. Image credit: Image Science and Analysis Laboratory, NASA-Johnson Space Center. |

|
AS13-59-8558 Browse or print resolution. Lunar Module Aquarius seen from the Command Module shortly before LM jettison. A RCS thruster quad assembly is on the left and the LM's overhead docking window is on the right. Image suffers from camera shake. Image credit: Image Science and Analysis Laboratory, NASA-Johnson Space Center. |

|
AS13-59-8559 Browse or print resolution. Lunar Module Aquarius seen from the Command Module shortly after LM jettison. A RCS thruster quad assembly is centre frame. Image credit: Image Science and Analysis Laboratory, NASA-Johnson Space Center. |

|
AS13-59-8560 Browse or print resolution. Lunar Module Aquarius seen from the Command Module shortly after LM jettison. A RCS thruster quad assembly and a footpad are visible. Image credit: Image Science and Analysis Laboratory, NASA-Johnson Space Center. |

|
AS13-59-8561 Browse or print resolution. Lunar Module Aquarius seen from the Command Module shortly after LM jettison. The closed tunnel and the severed docking ring are visible at the top of the LM. Image suffers from camera shake. Image credit: Image Science and Analysis Laboratory, NASA-Johnson Space Center. |

|
AS13-59-8562 Browse or print resolution. Lunar Module Aquarius seen from the Command Module shortly after LM jettison. The closed tunnel and the severed docking ring are visible at the top of the LM. Image suffers from camera shake. Image credit: Image Science and Analysis Laboratory, NASA-Johnson Space Center. |

|
AS13-59-8563 Browse or print resolution. Lunar Module Aquarius seen from the Command Module shortly after LM jettison. The closed tunnel and the severed docking ring are visible at the top of the LM. Image suffers from camera shake. Image credit: Image Science and Analysis Laboratory, NASA-Johnson Space Center. |

|
AS13-59-8564 Browse or print resolution. Lunar Module Aquarius seen from the Command Module shortly after LM jettison. The closed tunnel and the severed docking ring are visible at the top of the LM. Image credit: Image Science and Analysis Laboratory, NASA-Johnson Space Center. |

|
AS13-59-8565 Browse or print resolution. Lunar Module Aquarius seen from the Command Module shortly after LM jettison. The closed tunnel and the severed docking ring are visible at the top of the LM. Image suffers from slight camera shake. Image credit: Image Science and Analysis Laboratory, NASA-Johnson Space Center. |

|
AS13-59-8566 Browse or print resolution. Lunar Module Aquarius seen from the Command Module shortly after LM jettison. The closed tunnel and the severed docking ring are visible at the top of the LM. Image credit: Image Science and Analysis Laboratory, NASA-Johnson Space Center. |

|
AS13-59-8567 Browse or print resolution. Lunar Module Aquarius seen from the Command Module shortly after LM jettison. The closed tunnel and the severed docking ring are visible at the top of the LM. Image suffers from slight camera shake. Image credit: Image Science and Analysis Laboratory, NASA-Johnson Space Center. |

|
AS13-59-8568 Browse or print resolution. Lunar Module Aquarius seen from the Command Module shortly after LM jettison. The closed tunnel and the severed docking ring are visible at the top of the LM. Image credit: Image Science and Analysis Laboratory, NASA-Johnson Space Center. |

|
AS13-59-8569 Browse or print resolution. Lunar Module Aquarius seen from the Command Module shortly after LM jettison. The closed tunnel and the severed docking ring are visible at the top of the LM. Image suffers from slight camera shake. Image credit: Image Science and Analysis Laboratory, NASA-Johnson Space Center. |

|
AS13-59-8570 Browse or print resolution. Lunar Module Aquarius seen from the Command Module shortly after LM jettison. The closed tunnel and the severed docking ring are visible at the top of the LM. Image credit: Image Science and Analysis Laboratory, NASA-Johnson Space Center. |

|
AS13-59-8571 Browse or print resolution. Lunar Module Aquarius seen from the Command Module shortly after LM jettison. The closed tunnel and the severed docking ring are visible at the top of the LM. Image suffers from camera shake. Image credit: Image Science and Analysis Laboratory, NASA-Johnson Space Center. |

|
AS13-59-8572 Browse or print resolution. Lunar Module Aquarius seen from the Command Module shortly after LM jettison. The closed tunnel and the severed docking ring are visible at the top of the LM. Image credit: Image Science and Analysis Laboratory, NASA-Johnson Space Center. |

|
AS13-59-8573 Browse or print resolution. XXXXXXXXXXXXXXXXX Caption XXXXXXXXXXXXXXXXXX. Image credit: Image Science and Analysis Laboratory, NASA-Johnson Space Center. |

|
AS13-59-8574 Browse or print resolution. XXXXXXXXXXXXXXXXX Caption XXXXXXXXXXXXXXXXXX. Image credit: Image Science and Analysis Laboratory, NASA-Johnson Space Center. |

|
AS13-59-8575 Browse or print resolution. XXXXXXXXXXXXXXXXX Caption XXXXXXXXXXXXXXXXXX. Image credit: Image Science and Analysis Laboratory, NASA-Johnson Space Center. |

|
AS13-59-8576 Browse or print resolution. XXXXXXXXXXXXXXXXX Caption XXXXXXXXXXXXXXXXXX. Image credit: Image Science and Analysis Laboratory, NASA-Johnson Space Center. |
| 70-mm magazine N - AS13-58-8456 to 8481 |
Photography Index | 70-mm magazine L - AS13-60-8577 to 8725 |