
Select an image to view a diagram.

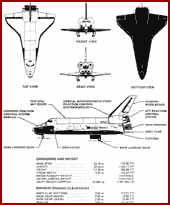
from Space Shuttle News Reference (NASA), p 1-8
from Space Shuttle News Reference (NASA), p 3-4
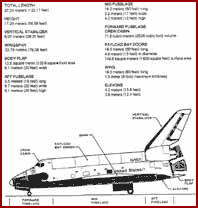
from Space Shuttle News Reference (NASA), p 3-5
Dimensions of the Orbiter Vehicle
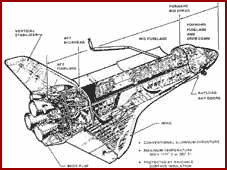
from Space Shuttle News Reference (NASA), p 3-6
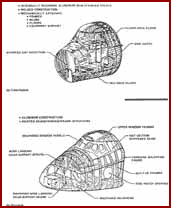
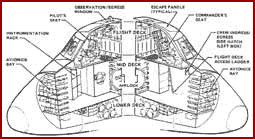
Forward Fuselage (crew module and structure)
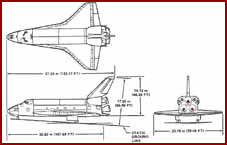
from Space Shuttle News Reference (NASA), p 3-7
from Space Shuttle News Reference (NASA), p 3-8
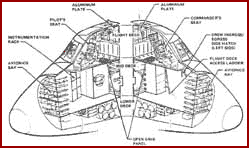
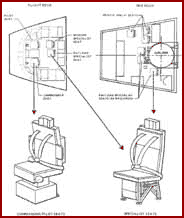
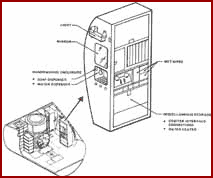
Flight-deck Crew Cabin Arrangement
from Space Shuttle News Reference (NASA), p 3-9
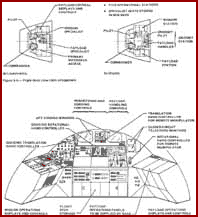
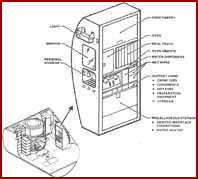
Mid-deck Crew Cabin Arrangement
from Space Shuttle News Reference (NASA), p 3-10

from Space Shuttle News Reference (NASA), p 3-23
from Space Shuttle News Reference (NASA), p 5-5
from Space Shuttle News Reference (NASA), p 5-8
from Space Shuttle News Reference (NASA), p 5-6
from Space Shuttle News Reference (NASA), p 5-9

Postlanding Agress Routes with Ejection Seats
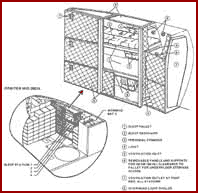
from Space Shuttle News Reference (NASA), p 5-12
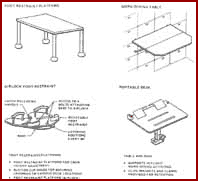
Galley Configuration (concept)
from Space Shuttle News Reference (NASA), p 5-21
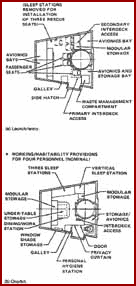
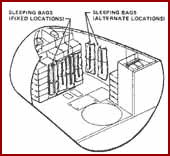
Rigid Sleep Station Provisions
from Space Shuttle News Reference (NASA), p 5-25
Personal Hygiene Equipment on Orbit Locations (with galley)
from Space Shuttle News Reference (NASA), p 5-26